Free email for a domain wasn’t really a problem until quite recently, since everyone just used Yandex. But after Yandex was blocked in Ukraine, the remaining option was Google, where email for a domain costs $5 per mailbox. Now imagine this: your company has 20 people, and everyone needs a corporate email address. That’s no longer $5 — it’s a full $100! There’s always somewhere else to spend $100 in an office, so plenty of people go looking for new, convenient, and free email options for their domain. Here’s what I found for myself: I have hosting on ukraine.com.ua (I’m sure I’m not the only one). You can set up free email with your own domain there. But their webmail client is awful — I didn’t even bother using it. So I remembered good old Outlook, which I’d never really used before. As it turns out, it’s actually pretty convenient, especially if you have several mailboxes. The one thing it’s missing is threaded conversations.
Step one — setting up domain email on ukraine.com.ua
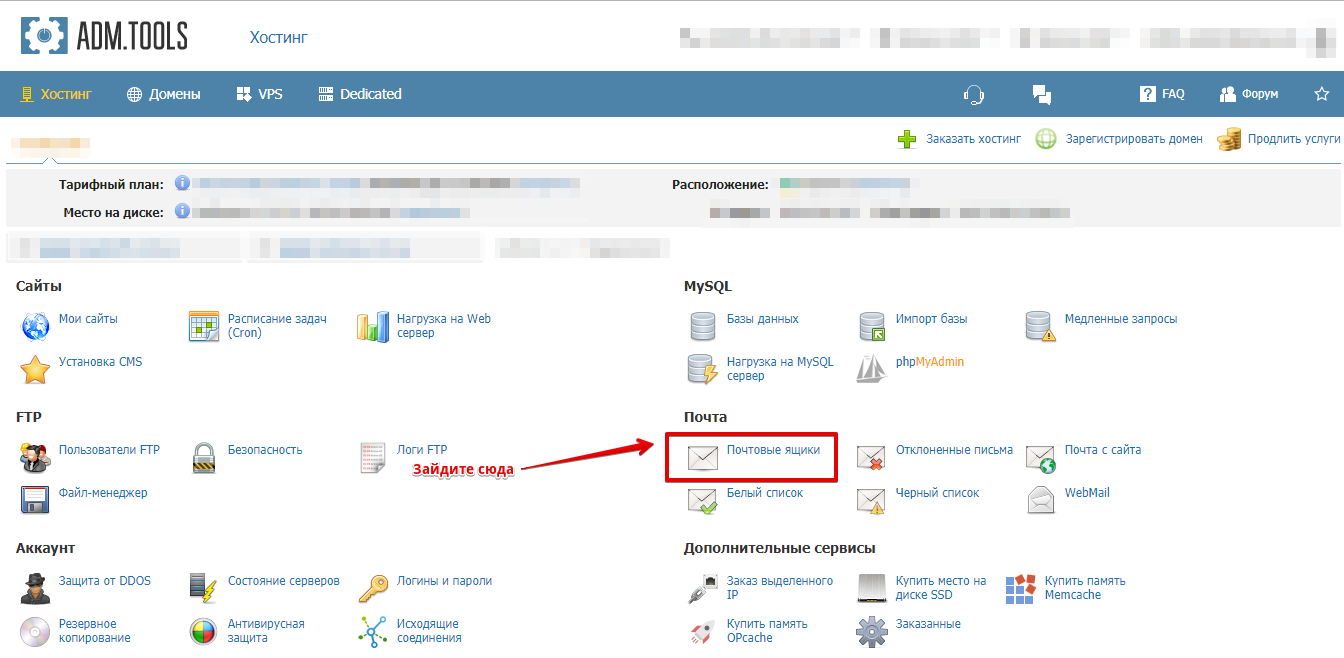
First, set up email for your domain on ukraine.com.ua. Naturally, your domain also needs to be hosted with this service. Log in to your hosting account and select “Mailboxes.”
Next, click “Create Mailbox” and simply enter the email address and password.
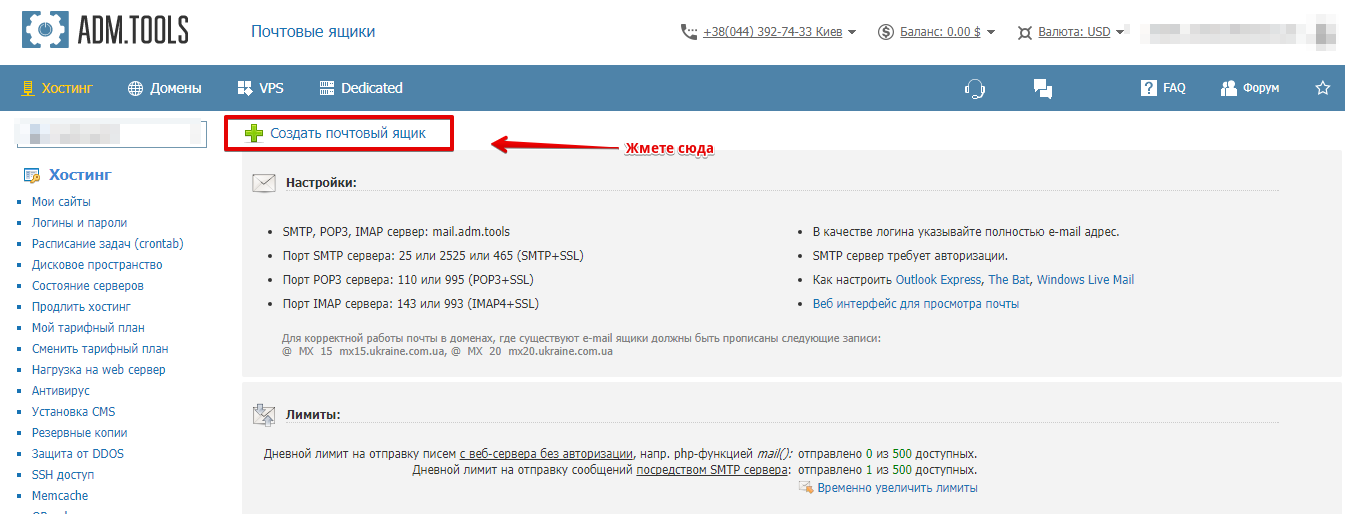
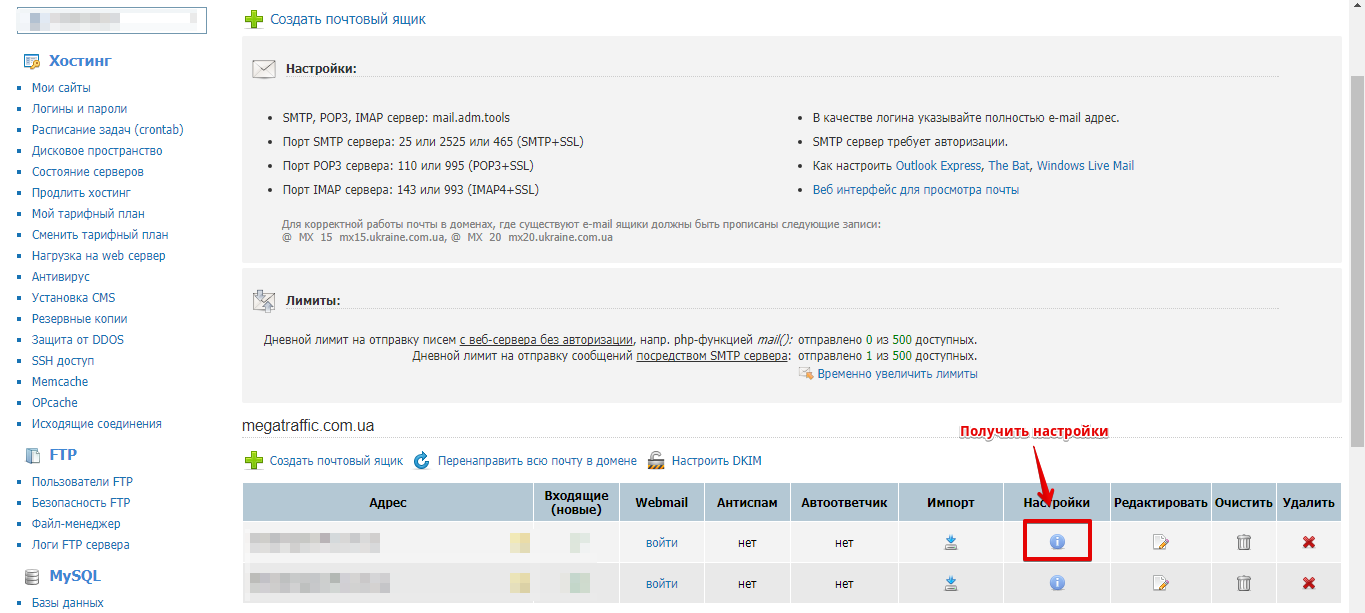
But to get email actually working, go into your domain settings and add the required MX records. It’s pretty simple, since a hint will pop up automatically — just confirm it. Now you have email on ukraine.com.ua, and all that’s left is to set it up in Outlook. To do that, you need to get your email settings, which you can find a bit further down on the same page, as shown in the screenshot.
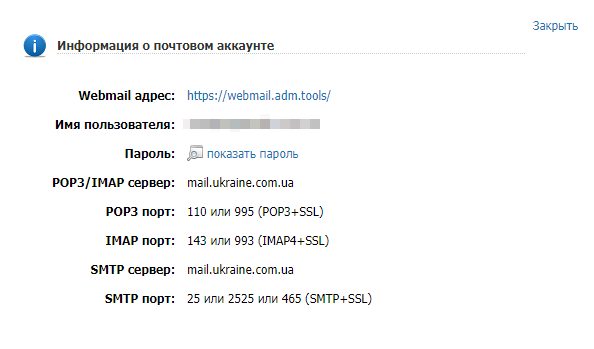
A window like this will appear — just save it so you can enter this data into Outlook later.
Step two — setting up domain email in Outlook
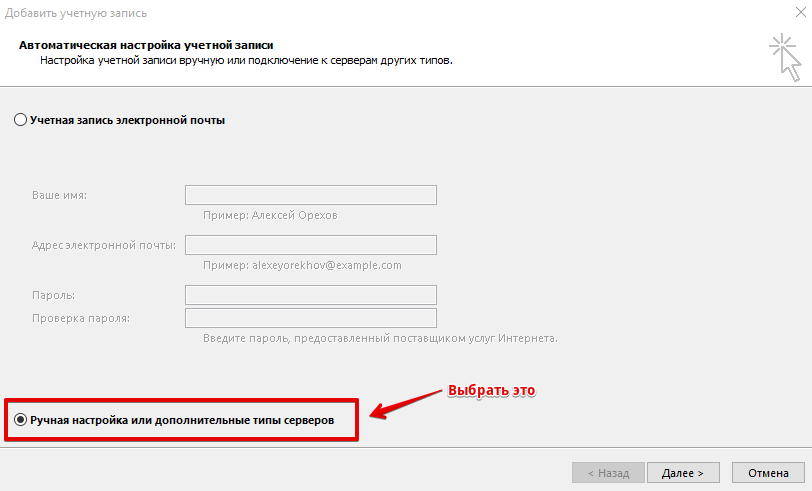
Open Outlook and choose “File” in the top-left corner, then “Add Account.” A window will pop up, and you need to select the same option shown in the screenshot.
Next, select “POP or IMAP,” and an account settings window will appear that you need to fill in. Wherever you see my email entered, put in your own email and password instead.
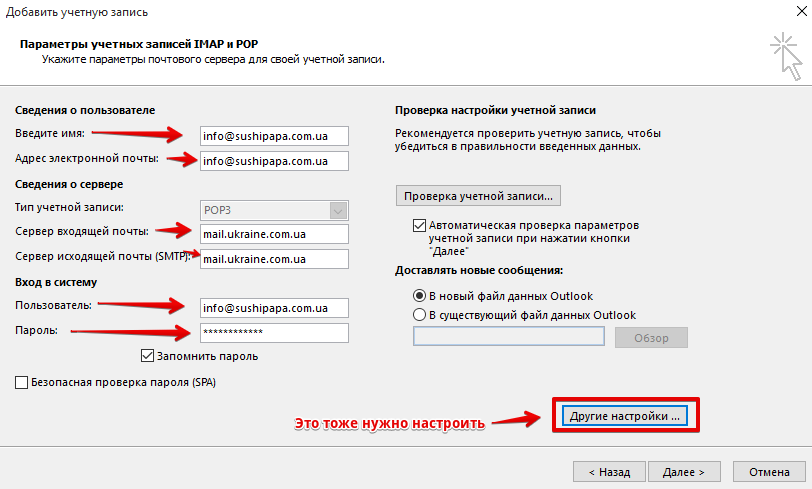
Be sure to also click “More Settings.” Leave the “General” tab as is, and set up the other tabs exactly as shown in the two screenshots below.
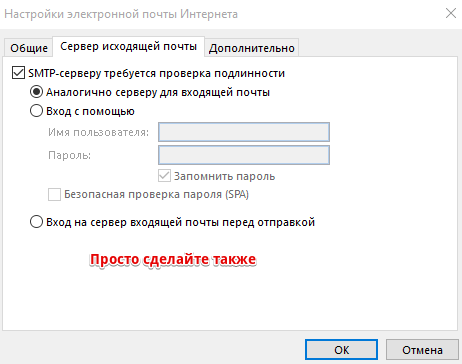
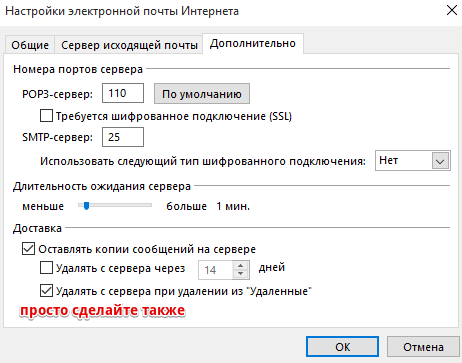
Now everything’s ready, and you can click “Next.” Your email is set up.
Setting up a signature in Outlook
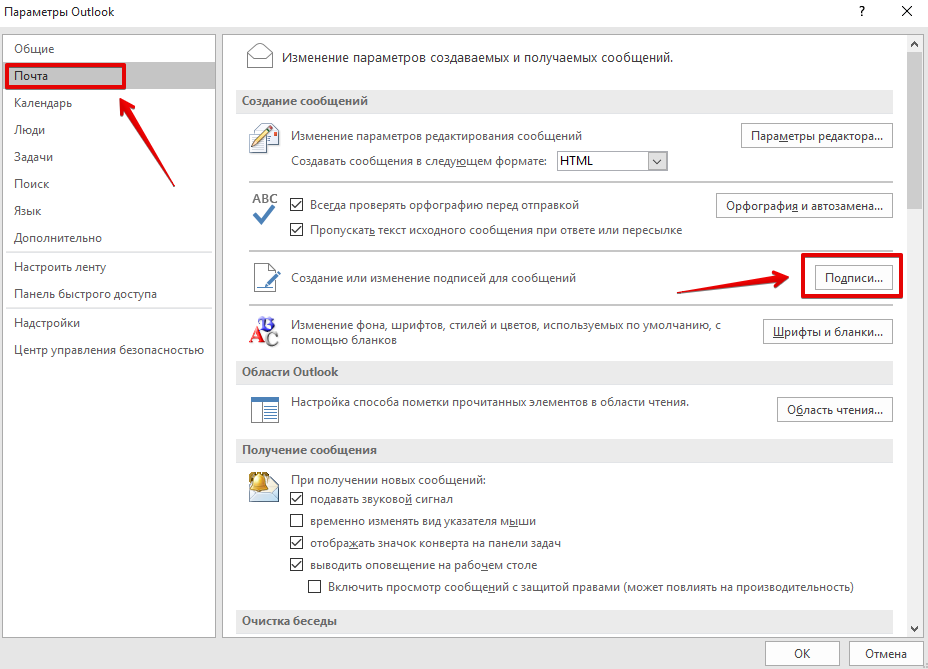
To set up a signature, click “File” in the top-left corner, then “Options” in the menu on the left, and follow the steps shown in the screenshot.
Setting up mail delivery frequency in Outlook
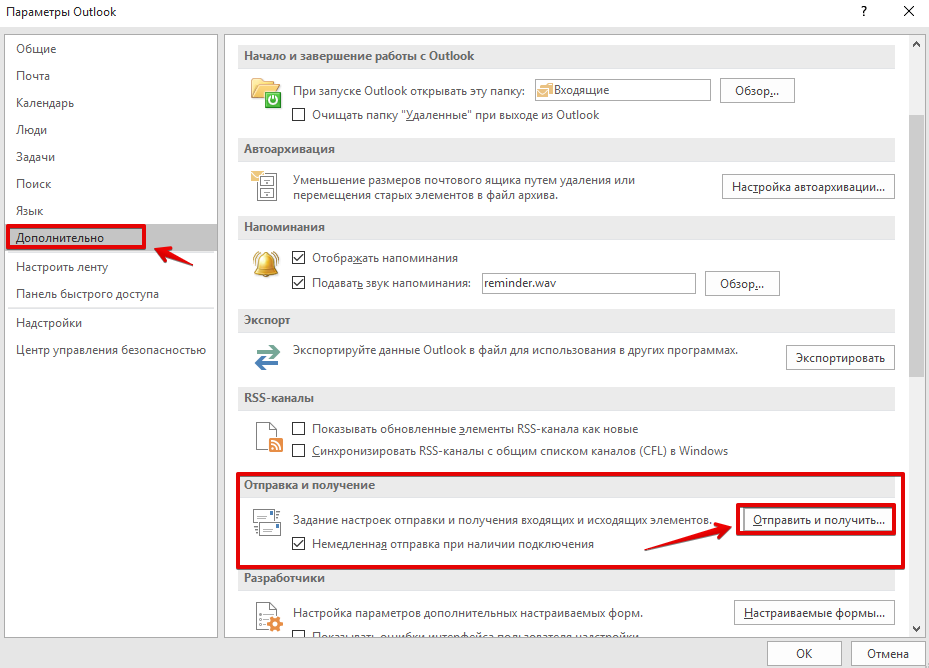
Here’s the thing: Outlook doesn’t quite work fully online — in the basic setup, mail is sent and received every 30 minutes, or when you press F9. That’s unlikely to satisfy most users, so you need to adjust the delivery frequency; for example, mine is set to 1 minute. To do that, click “File,” then “Options,” and follow the steps shown in the screenshot below.
Important
When I first started using Outlook, I noticed this: if you click “Close,” the program actually shuts down and notifications stop coming in, which just doesn’t work for me. So never close the program — just minimize it instead. And to stop the active icon in the taskbar from being annoying, check the “Hide when minimized” box, as shown in the screenshot.

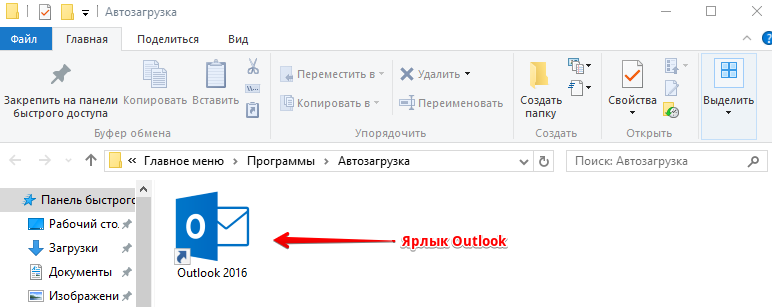
One more small detail: to have your email client launch automatically when your computer starts, press Win+R, type shell:startup into the “Run” box, and hit “OK” — a folder will open. Place a shortcut to Outlook in that folder.